Showing posts with label craft. Show all posts
Tuesday, June 18, 2013
Funky Gift Topper!
Do you ever have those creative moments where you hit a stroke of crafting genius? Like when you think of a craft or creation you never thought of before and it's like "Ah-ha! That is brilliant!"
I had one of those moments when I was staring at my craft closet wondering what in the crap I was going to wrap my friend Stacey's birthday gift in. Stacey likes an funky and fresh gift topper as much as a blogger should, so I knew conventional bows were kind of a no-go if I wanted to make my gift card (boring gift) really special.
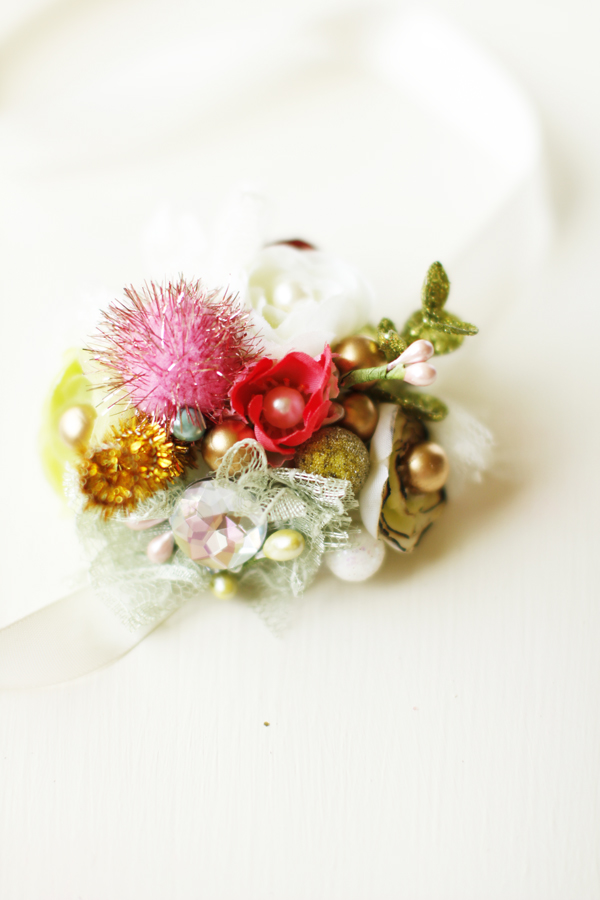
And then I saw it...a mini Styrofoam ball I had cut in half for this craft last December. It was flirting with me and I wasn't about to walk away. I set that blank canvas Styrofoam ball down on my craft table and started pulling other supplies from the shelves.
Gold pipe-cleaner? Uh, yea.
Pink and green lace flowers. Of course.
Pearls and lace bows and sequins. This is a craft project after all.
And then I plugged in the trusty glue gun and glam-ed out that Styrofoam ball like a boss.
I must admit, It turned out pretty darn fabulous. It sends off a Tim Burton meets Marie Antoinette kind of vibe, don't cha think?
I like it!
I am thinking of adding some of these to my shop (and giving my shop a face lift while I'm at it...because it really needs one). Stay tuned for some new products from yours truly ;)
Annnnnd....there is a slight chance I went overboard and posted 13 photos of this one gift on this post. So, there.
Monday, June 10, 2013
Glitter Magnet Craft
So I've mentioned my obsession with the blog deignlovefest before. Not only is Bri Emery n' company brilliantly talented...but they happen to be engaging as well. These past two weeks designlovefest has called on readers to re-create some of their favorite designlovefest DIYs...can you say "right up Alix' alley"? I'm all over this challenge. You're supposed to make the craft, photo the craft, and then Instagram it with #designlovefestDIY!
I decided to recreate these little glitter magnets, but with my own flair. Mission accomplished? Maybe. So cute you could die? For sure! (But don't really die. This is just a craft for hell's sake).
Bonus...this craft was FREE. No trips to the wallet-black-hole that is Hobby Lobby. I used leftover glitter from this snow globe craft, and left over magnets from this advent calendar craft. Double gold stars for me ;)
And don't you worry...I've got more designlovefest DIYs in the works...and you should craft along with me!
To see more of my craft inspiration you can check me out (wink wink) at Pinterest! Happy Monday!
Tuesday, May 28, 2013
My Vintage Cake Platter Makeover
Every now and then you just need to take some pretty pictures. There is really no need to explain yourself and they never need to be printed or framed, just appreciated by you. And after I fixed up this beautiful little cake platter I thought to myself, this babe deserves a photo shoot. So I gave it the glam it deserved and put a cake on it. Some milk with tea cups and saucers too??? You bet.
Here is what Ms. Cake Platter looked like when I picked her up from the flea market:
Can I just say, I love a piece with potential. More so than something that has reached it's full potential. I love the vase that is improved upon with fresh flowers or the old chair that needs a new coat of paint. The transformation seems so brilliant to me. That something may appear old or used and ordinary, but with the right perspective and some hard work a flea market find can become a treasure for a lifetime.
I think this is the same with people for me. I am drawn to individuals whose potential and talent appeal to me, but they haven't reached that pinnacle yet. These kinds of people only get better with time. They are always moving forward. That's one of the things I love most about Clint. The longer we are married the more interesting I find him.
When we got married I was 20. I was a baby. Let's just say he definitely married me for my potential and I will keep praying that 20 was not the pinnacle of Alix. In fact I vividly remember talking about our futures on our third date. I was only 18 (even a littler baby!). I asked, like a silly girl, if he thought I was a success as a person. Clint looked over at me and smiled and said, "you have so much potential". I beamed. This seemed like a real complement to me back then (now it kinda sounds like an insult upon reflection :) ) but I couldn't imagine a more promising quality to possess than potential. It means you are going to get better, move forward, your greatest work of art is yet to come.
Potential is how I feel about my blog, my photography, even my parties. I have so much creating left in me and I am always wrestles to make something new happen. Today I want to buy the orchard across the street and do horse-drawn slay rides. Tomorrow I want to start a wedding planning company. Perhaps this little beauty of a cake dish, with it's fresh coat of white paint, will make an appearance in a future craft party I host. Or maybe it will pop up at a baby shower for a little girl. Some day. But make no mistake, this little cake platter has potential.
Labels:
Clint,
craft,
DIY,
life essays,
ramblings
Teepee DIY
I am a little bit giddy to share with you this craft. Remember Liam's teepee from his birthday party and bedroom makeover? Well today on And Then We Saved I'm teaching you how to make a teepee of your own! And this one is very girly and very fabulous! Go and check it out!
Wednesday, May 15, 2013
Veggie Stamp DIY!
Today's DIY craft makes me so excited I could do a little jig. Seriously. And it's soooooo easy, fun to do with your kids, and requires potatoes. Plus it's patriotic (go America!) and cheeeeeeap. It was so fun I was kinda wishing Liam was a little older and could do it with me (but only kinda...would you slow down the growing Liam, please). Alright, enough nonsense. Let's dive right into the crafty crap!
Materials:
- Craft paint in the colors that make you swoon
- A piece of material (or paper even). I chose a canvas-like material.
- Veggies (potatoes and carrots made the most sense to me)
Steps:
1| Cut a shape into your veggie. For the carrots I just cut off the rounded edges to make them into squares and triangles. For the potatoes I cut them in half, then traced a triangle about 1/4" deep into the flat area of the cut potato. Then I turned my knife parallel to the flat area and shaved away the edges, revealing a shape!
2| Next, I taped out my map design on my fabric. I printed off a map, cut it out, and traced it with tape onto my canvas.
3| Dip your potato or carrot into your paint, making sure to cover the whole shape surface.
4| And stamp it onto your canvas! It took me about an hour to stamp my entire map area and about 2 hours for it to dry completely. It was worth the wait!
5| Finally...peel off your tape outline to reveal your fabulous geometric design!
What I love most about this project is that it is a great way to bring some bright color to your home. I am planning on framing this sucker and hanging it in my craft room. The geometric design looks really fresh and fun, but is also super easy to recreate. You don't even have to be crafty to stamp with veggies! Send me pictures of your veggie stamp creations!
P.S. Thanks for the encouraging words from yesterday's post!
Friday, May 3, 2013
Cinco de Mayo DIY Cup Lights!
I am all about celebrating the little holidays around here. I mean, I don't go all crazy and decorate every room in math symbols and nerd glasses for Pi Day, but I will throw together a couple crafts in the name of DIY. Cinco de Mayo seems like an important enough holiday to commemorate. It feels like a holiday that brings us together. In the spirit of celebrating Mexican heritage in America we come together for tacos and drinks (like sprite and lemonade, of course), which seems like an important thing to do. While pulling out the glue gun for Groundhog Day is necessary, I have yet to perfect the art of freezing time and therefor have to limit some of my crafting to the simple and super quick. So here is my little Cinco de Mayo 10 minute craft. It literally takes 10 to 30 minutes so you will have it done in plenty of time to enjoy
Supplies
- Light strand
- Paint
- Glue
- Glitter (of course...I just can't call a craft done until I add excessive amounts of glitter)
Steps
1| Paint those cups! You can pick any variety of colors you want and paint as many cups as you want (so long as there are enough lights on you strand for all of them). Easy peasy.

2| Dip the top rim of you painted cups in white craft glue. Make sure the whole rim is covered in glue in insure complete glitter coverage (critical to the success of your craft).
3| Dip the cup in glitter, hey! Dip the cup in glitter, hey! Dip the cup in glitter, hey! (must sing those words like you are doing a conga line-this is a party after all)
4| Cut a hole in the bottom of your cup and stick it on a light strand. Then enjoy!
And I paticularly loved they way they lit up the night :)
Subscribe to:
Posts (Atom)