Thursday, November 29, 2012

8 months

Our little Nugget is 8 (well 8.5) months old! And we are totally smitten with this kid. I can't believe how big he is...seriously I remember plopping him down on this chair a few months ago and his head only went half way up the chair back...and I was snapping photos while catching him from falling off the chair (because he wasn't quite grown up enough to balance while sitting up)...you know in retrospect maybe not such a great idea.

So Liam has a few funny new things he has taught himself to do lately...

he is scooting around army-crawl style all over the place

and he sports this super serious face while he grumbles in a deep voice which we naturally call his "demon baby voice". it's super scary.

Liam has always loved me best, but lately he has adopted a serious case of the "I need only mommy all the time"s

and he's in the middle of everything.


Don't forget to tell me about your family traditions here!

Wednesday, November 28, 2012

Merry Mantel

 On the first day of December I woke up to a to-do list longer than my Christmas tree is tall. And I put on my big girl panties and set out to tackle that list, so help me. From one frantic activity to another I paused only to complain about how much I had to do or to rebuke Husband for not joining me in my relentless pursuit of list completion...
and then husband said something that was pretty important. Something pretty wise. He said, "could you just relax and enjoy your day and not get so stressed when you don't get everything done?"
and I was like, duh Alix, this time of year is to enjoy each other, not cross each other off a list.
don't tell him, but Husband made me realize that I need to relax...Christmas will come no matter what I do or don't get done. That special day will come whether or not I enjoy the next few merry weeks.
So enjoy I will. 
Celebrate I will. 
Be grateful for Christ, His birth, His atonement, I will. 
Sound like Yoda, I do. 

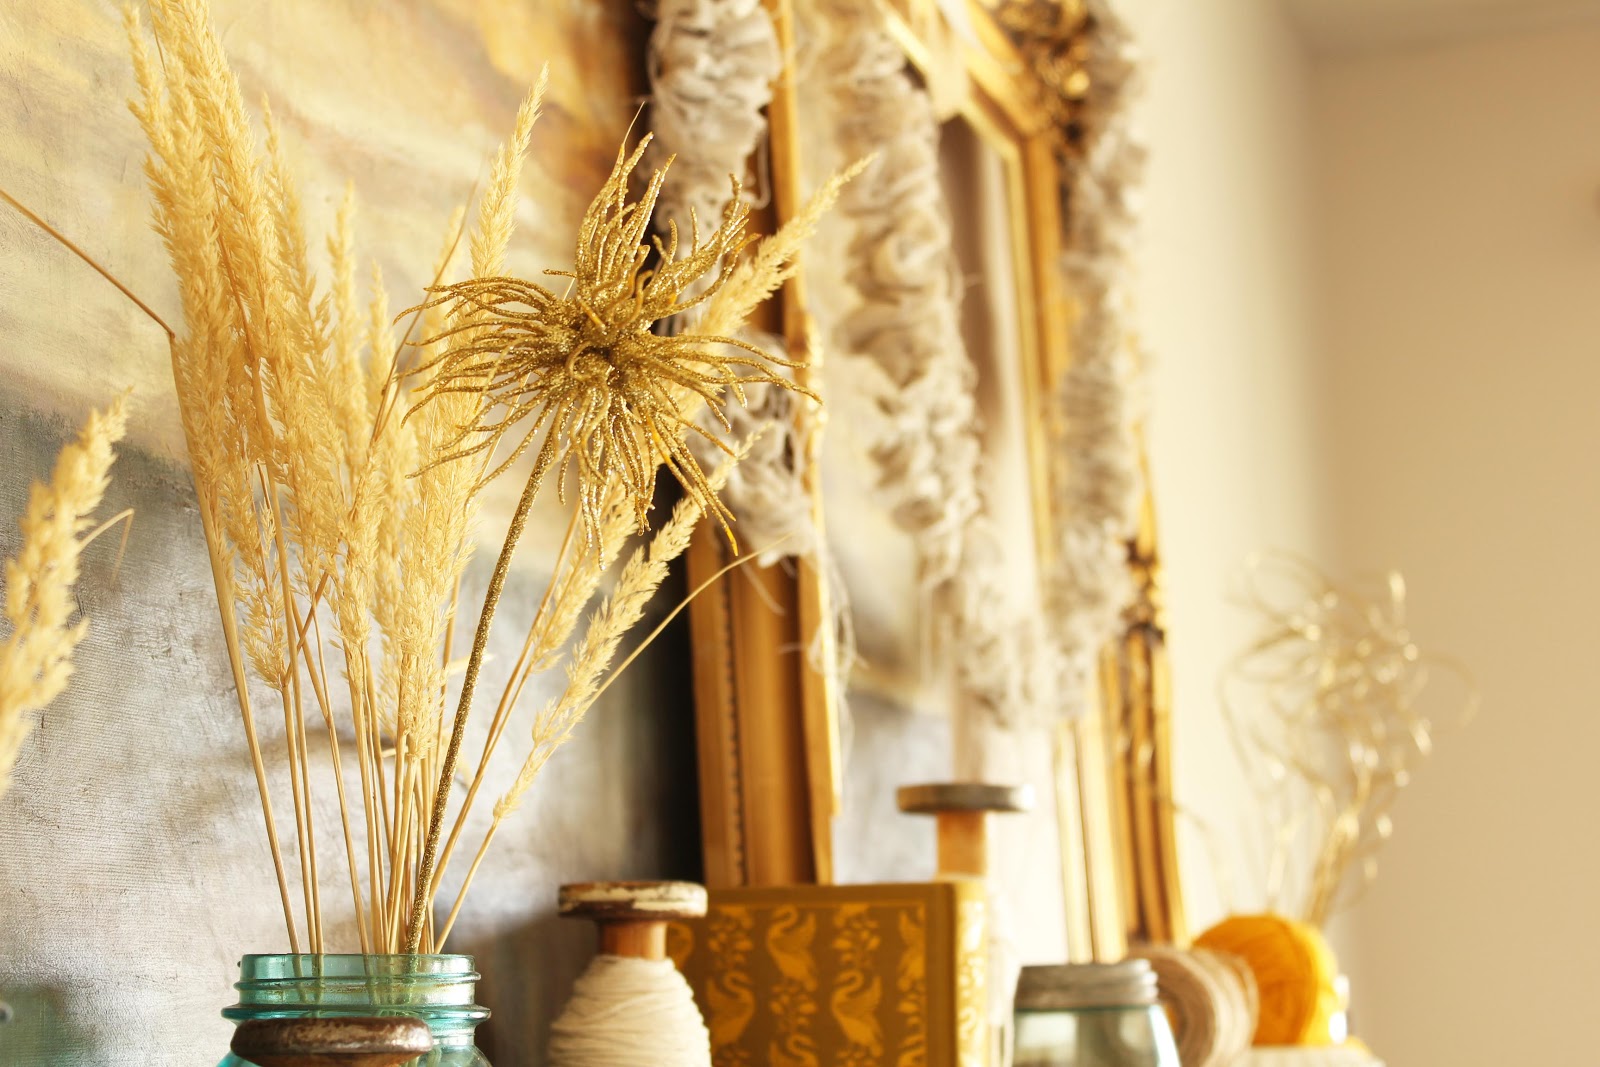
I might not get everything done that I "need" (aka "want") to do, but I did get this Holiday mantel done. and that's something worth noting. So consider it noted.


Welcome December!


The best part of this Holiday mantel, obviously, is the glitter antlers. You guys, I have been asking my Husband to get me a set of antlers for a while now and then I just decided to make some myself. 

The Materials
- mdf board >> you can find pre-cut 2'x2' boards at Home Depot!
- Teal Paint >> Glidden semi-gloss, color Floating Bubbles (who doesn't want that color in their life?)
- Gold glitter >> Hobby Lobby (or wherever)
- Elmer's liquid glue >> WalMart (or wherever)

The Design
I did antlers because antlers are usually on my mind (hence my blog title graphic), but I highly encourage experimenting with other Holiday designs (and with other colors of paint and glitter).
Some ideas I considered... 
- a snowman: 3 mdf boards hung in a vertical row, each with a glittery circle in each
- a target on one board and an arrow on the other
- a Christmas tree

The Process
1| paint the board/s teal (or color of choice) >> let dry completely
2| in pencil, sketch design on board
3| in sections, paint glue within the design (aka: the desired glittery sections)
4| sprinkle glitter on the glue
    note: it helps to glue and glitter in sections so that the glue doesn't dry before you add glitter
5| dump off excess glitter
6| mount on wall >> I used a sawtooth hanger mount (also from Home Depot), but you can use wire or just prop them up on a mantel


and an important part of this time of year is family traditions...don't forget to tell me your traditions here!!!

Check out my fall mantel here


Tra-di-tion! Tradition!

The title of this post must be read while singing like Fiddler on the Roof's opening number (which is kind of ironic because this post is about Christmas traditions).
Moving on.
Image via kelli dee photography
I am a big fan of family traditions this time of year (or in general). I like reading a new Christmas book (picture book of course) in new pajamas on Christmas eve. I love the exchanging of Christmas gifts and cooking cinnamon rolls and listening to cheesy 1950s music about snow.
And last night Clint and I were talking about starting some of our own new family traditions (well I was talking about it and Clint was playing Free Cell on his phone). So this post is all about asking a question...What are your holiday traditions? I really want to know! I need some help coming up with fun family-filled annual festivities and it has come to my attention that there is this resource for such ideas...you!
So leave a comment with your Christmas (or Jewish) traditions...and if I love it (which I am sure I will) I may post about it! And if I really really love it...I may send you a treat! :)

Wednesday, November 21, 2012

portraits of 8 AM

Sometimes it is 8:00 am and Nugget is sleeping. I quietly roll out of bed, tiptoe down the stairs, and sneak a bowl of mini wheats. And then, with cereal in hand, I indulge in some blog reading. The greatest part about this new house-like my absolutely favorite part ever-is my craft room. It's like my sanctuary, a room just for me, well me and my pet cactus. At 8:00 am the sun shines glorious rays of warmth, full throttle through my south-facing window. It is the warmest room at 8:00 am. All is calm at 8:00 am.
But then I feel the pull of laundry
and the rustling of an anxious dog
my fingers drift from scrolling through blogs to my inbox of emails and their answering
upstairs my chubby sidekick starts to rustle and fuss awake
and then it is after 8:00 am
and it is time to begin everything else that happens after 8.

I sure do feel lucky that my moments alone are at 8 am and not yet 5 am. I feel grateful for my home, my freedom, my faith.
But more than anything I am grateful for my family. My husband. And that little Nugget who needs me constantly (but sometimes not at 8 am).


Monday, November 19, 2012

holiday wreath DIY


My Home Depot holiday is in full throttle now!
This holiday wreath is simply lovely! And it is easy to make. And it is inexpensive.
That's a trifecta people.

Materials:
- pool noodle (that's right...a pool noodle)
- painter's drop cloth (from Home Depot of course)
- decorative items...for example, twine (Home Depot) or burlap (Home Depot) or a little bling (disco ball ornament)
- duct tape (Home Depot)
-  hot glue/hot glue gun

Got all your materials? On your mark, get set, wreath!


1| Begin by taking that pool noodle and looping it into a circle the size of the wreath you desire. Make sure to not make the loop/wreath too small because the noodle will start to bend and kink and then you wont have a circular wreath, it will be more like a triangle. So good size loop, and then mark on the noodle where you will cut

2| Next, get out the cutlery...well just one serrated-edged knife and cut right through the noodle at your mark. Make sure that it is a smooth cut so the end of the noodle will fit flush with your cut end.


3| I spent a minute or two gently working the noodle into a circular shape. It wont stick as a circle on its own, but I did work out some tough spots that felt like they might kink.


4| Now duct tape those two ends together like its your job. This is actually the hardest part and may take 3 to 4 hands instead of 2. So grab a friend. And make sure that you use LOTS of duct tape because if you don't that stubborn noodle will pop out of the tape. It's not pretty, but the more duct tape the better.


5| For the next part you will need your glue gun ready and strips of painter's drop cloth cut. Begin by placing a strip of hot glue onto the noodle. This will melt the noodle a little bit, but it is nothing to panic about. Then stick the end of your painter's drop cloth strip to the hot glue, and then start wrapping the strip around your noodle form. 


6| Continue by gluing strips of drop cloth all the way around your noodle form. If you used lots of shorter strips of cloth, make sure you start new strips where your last one ended and make sure to make the back of your wreath the side where all the strip ends meet up (so you don't have strip ends showing). Or just cut one really long strip that goes all the way around. I roughed up the strip edges (made them look stringy) by rubbing my hand around the wreath.


7| Bling it out! I used these mini ornaments and disco balls from Hobby Lobby to bling up my drop cloth wreath.

So there you have it...go get your wreath on!


Thursday, November 15, 2012

My fall mantel + garland DIY


Hello all! The Home Depot holiday quest continues! Remember how I told you in this post about how I would post about my rustic garland and such? Well that is this post yo!

This week I decorated my mantel in fall fun (I got a little ahead of myself with the advent calendar in November, but we are all amped for Thanksgiving. We really are). And it just wouldn't be a fall mantel party without inviting the garland, and let me tell you I so have a crush on this garland. So lets get to it!

My mantel sports 2 kinds of garland:
1. painter's drop cloth garland
2. gardening burlap garland

Materials-All materials for both types of garland come from Home Depot of course!:
- painter's drop cloth (painter's drop cloth is literally the canvas-like material that painters throw on the floor to prevent paint spills from ruining the floor. You can find it in the paint section of Home Depot, it comes in lots of sized, and it is A-MAZING. Seriously, I have made everything from curtains to clothes out of this wonder material...and per yard, it is really inexpensive for fabric!)

and/or

- gardening burlap (I am not much of a gardener, but I am thinking this stuff is supposed to be used to wrap up trees and bushes and such. It comes in rolls that look like bubble tape bubble gum made of burlap. I'm addicted to it and it's cheap enough that I can indulge my addiction)
 
- jute (also know as twine...jute and twine come in lots of sizes but I prefer a medium thickness of jute/twin for this craft) 

Steps:

1| To begin you will need to cut long strips of painter's drop cloth (unless you are doing burlap garland, in which case the burlap is already one long strip). If using painter's drop cloth, I suggest you sew several long strips together to make your garland longer. Take the end of your jute/twine and sew it to the end of you strip. I suggest going over it several times so the end of the jute/twine is really secured to the strip.

2| Next, change your sewing machine to do a wide zig zag stitch. I know this isn't the technical term, mainly because I don't know the technical term, but the goal with this stitch is to sew on either side of the jute/twine. It is VERY IMPORTANT that you don't stitch on the twine because then your garland wont bunch. Now feed your strip through your sewing machine, stitching on either side of the jute/twine right down the middle of your strip.


3| As you can see, The jute/twine is zig zag stitched down the middle of the drop cloth strip, but it is not stitched to the strip.


4| Now the fun part. Holding the end of the strip that has the jute/twine securely stitched to it and "scrunch" the strip up the jute/twine, creating a ruffly and scrunchy effect! The zig zag stitch makes it possible for the jute/twine to be pulled away from the strip and this creates the ruffles! Woot woot! A bit of a note here: I would pause with the zig zag sewing every couple feet and scrunch. Then continue zig zag sewing. Pausing to scrunch as you go is way easier than scrunching at the end of sewing an 8 foot strip. Also, your strip can be as scrunchy on not-scrunchy as you want. Make your scrunch yours!


5| After you have scrunched to your heart's content and reached the end of the strip, you must secure the jute/twine end the same way you secured it at the beginning: with a few straight stitches that make sure the jute/twine is going nowhere.
Note: If at any point you make a mistake or happen to zig zag stitch over the jute/twine, don't panic! Simple cut the jute/twine at the place of your mistake, scrunch all unscrunched jute/twine, and then straight stitch the jute/twine you just cut to the strip at the end of the new scrunched area. Then continue with the zig zag stitch. If you run out of jute/twine, just get a new piece and start where you left off!

6| enjoy!!!


Tuesday, November 13, 2012

nap time photo booth

Sometimes it is nap time. And sometimes a certain little Nugget decides that he does not want to nap during nap time. No he doesn't want to nap one bit. And it is during such nap times that we turn nap time into a laying-down photo booth session.


This Nugget seems to think that he is quite in charge around here (who are we kidding...he totally is). When we take iPhone photos, his favorite part is looking at himself on the screen (so apparently he has an eye for adorable). And sometimes he will entertain himself watching Elf or chewing on his frog toy, but this only lasts 15 minutes before he lets us all know it has been far too long since he was held and cuddled. Every now and then he poops (like today-it was EVERYWHERE), but most of the time he prefers to hold it for days on end (the stubborn Nugget). And just this week he decided it was time to begin scooting around for items outside his reach. So I guess our lives will be on Nugget's terms for a while (at least until we have another wee one).

Friday, November 9, 2012

Advent Calendar DIY


Hello friends! I start this Home Depot Holiday with a delightful advent calendar! This kind of calendar is really the best kind...it comes with daily treats! Little gifts leading up to the very day of gift giving!

Okay here is the breakdown...

From Home Depot (HD):
- mini terracotta pots (also available at Hobby Lobby)
- magnetic metal sheet (you could also arrange the pots on your fridge!)

From Other:
- Paint (any holiday colors your heart desires)
- Magnets (about the size of a nickle)

Note: Most the stuff for the wreath and garland are from HD as well, but I am doing tutorials on them soon so there you have it :)


1| Start by picking your holiday colors (I chose red and white-inspired by the cutest Christmas candy...candy canes) and paint your mini terracotta pots. One of the best things about working with terracotta is that it soaks up paint very well and dries very fast. 1 coat red and 2 coats white otta work.


 2| Paint on those numbers! It takes a bit of dexterity but I know you can do it! Plus...those little numbers DO NOT have to be perfect...in fact the imperfection of it all it my favorite part! Also, results are inconclusive as to how many days you should have on an advent calendar... 24 or 25? I made 25 because, well, who wants less candy? Not me.


3| Next is the hot glue (second in versatility only to duct tape). Exactly opposite of your painted number place a glob of glue on the outside rim of your pot...


4| and the quickly glue on that magnet that makes the magic happen!


VWELLA! 


I made little burlap sacks to hold peppermint Kisses and added a few mini ornaments, but please feel free to stuff you mini painted pots with whatever your heart desires!